

Natural Light vs Studio Lighting for Boudoir Photography
Natural light and studio lighting can both produce beautiful boudoir portraits. The better choice is not determined by which source is more “professional”, but by the mood you want to create, the room available, the time of day and the level of consistency your client needs.
Window light can feel soft, intimate and immediate. Studio lighting gives the photographer greater control over direction, intensity and repeatability. Learning to recognise the qualities of both allows you to choose deliberately instead of depending on whichever light happens to be available.
This guide is written for photographers and compares natural light with controlled studio light for boudoir photography. It covers window light, a versatile one-light set-up, backlighting, silhouettes and dark-and-moody lighting, with simplified diagrams you can adapt to a bedroom, hotel suite or professional studio. You may also wish to read about How to Build a Professional Boudoir Photography Portfolio
Safety first: Stands, modifiers and cables must be properly secured. Keep equipment clear of walkways and wet areas, never position hot lights close to fabric or skin, and explain any major lighting change before darkening the room around a client.
Natural light vs studio lighting: the quick comparison
| Consideration | Natural window light | Studio lighting |
|---|---|---|
| Quality | Can be beautifully soft and organic | Can be soft, crisp, dramatic or highly controlled |
| Consistency | Changes with weather, season and time | Repeatable throughout the session |
| Set-up | Often quick with minimal equipment | Requires a light, modifier, stand and safe positioning |
| Direction | Determined mainly by the window | Can be placed almost anywhere |
| Exposure | May require wider apertures or higher ISO | Output can be adjusted to suit the camera settings |
| Client experience | Less equipment can feel relaxed | Predictability can make the session run smoothly |
| Best suited to | Airy portraits, lifestyle work and soft transitions | Consistent galleries, dramatic work and low-light spaces |
This is not an either-or decision. Many boudoir photographers begin with window light, switch to a controlled one-light set-up when conditions change and use backlight or low-key lighting for the final, more dramatic part of the gallery.
Understanding light before choosing a set-up
Before thinking about equipment, evaluate four characteristics:
- Direction: Where is the light travelling from in relation to the client?
- Size: How large is the source relative to the client? A larger apparent source usually creates softer transitions.
- Distance: Moving a source changes both its apparent size and how quickly illumination falls across the scene.
- Contrast: How much difference is there between the lit areas and shadows?
For boudoir photography, shadow is not automatically a fault. It can define the waist, separate limbs, add depth and create privacy. The aim is to place highlights and shadows intentionally while retaining the detail needed for the chosen mood.
Window light for boudoir photography
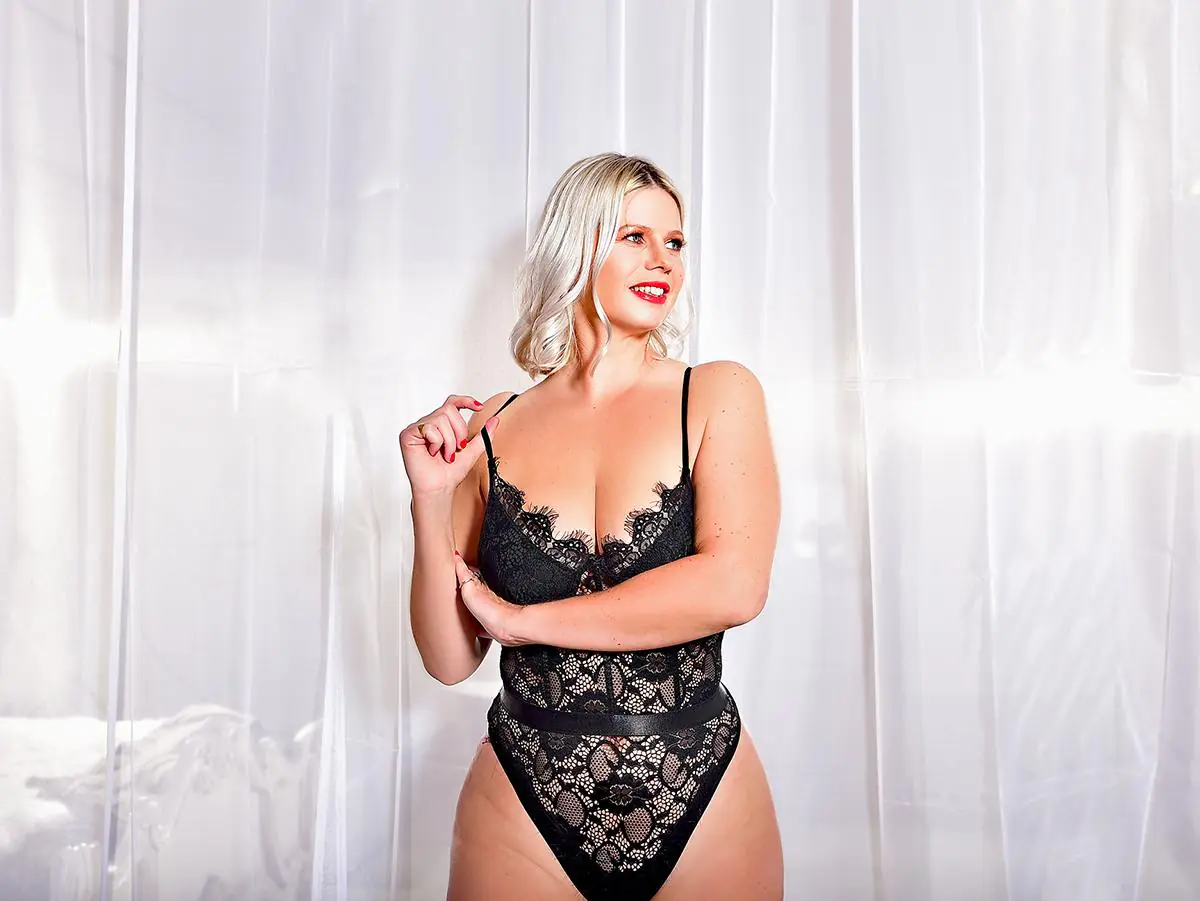
A large window can behave like an enormous softbox. Sheer curtains diffuse direct sunlight, while heavier curtains can narrow the source and create a more directional strip of light.
Place the client near the window rather than automatically facing it. Turning the body approximately 45 degrees towards the source can produce gentle modelling across the face and body. Moving the client parallel to the window creates stronger side light; turning them away produces backlight.
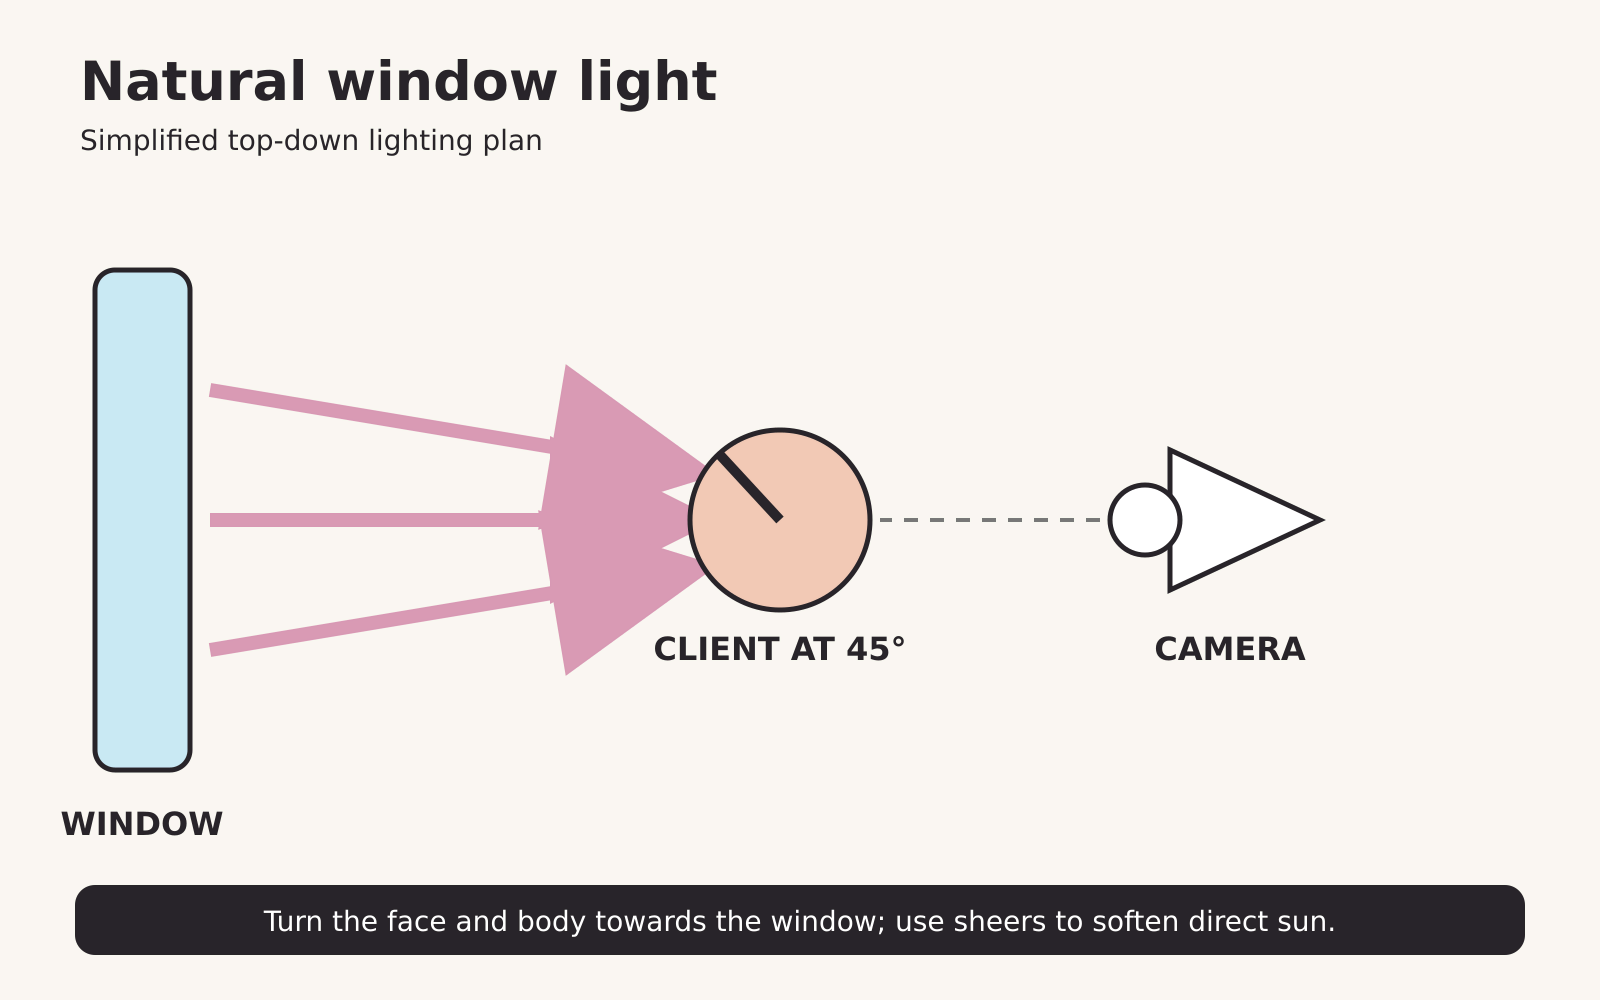
Starting approach:
- Switch off room lights that introduce unwanted colour casts.
- Observe whether the window is producing hard sunlight or diffused light.
- Use a sheer curtain if the highlights are too abrupt.
- Place the client at roughly 45 degrees to the window.
- Turn the client’s face until both eyes receive the intended amount of light.
- Expose carefully for important skin highlights and check the histogram.
When window light works particularly well
- soft bridal boudoir portraits;
- relaxed lifestyle images on a bed or chair;
- close portraits with gentle skin transitions;
- hotel or home sessions with large, uncluttered windows;
- nervous clients who may initially prefer minimal equipment.
Common window-light problems
The light changes during the session. Record a reference exposure, monitor the histogram and be ready to adjust ISO, aperture or shutter speed. If consistency is essential, change to studio lighting before conditions deteriorate.
The face is bright but the body falls into heavy shadow. Turn the client or move them further from the window so the illumination falls more evenly. A white reflector may provide subtle fill, but avoid flattening every shadow.
The light has mixed colours. Turn off tungsten or mismatched LED room lights. Use one dominant colour temperature wherever possible.
Direct sun creates distracting patches. Diffuse it with sheers, move the client out of the beam or use the pattern deliberately as a graphic effect.
A versatile one-light boudoir set-up
One studio light is enough to create a wide range of professional boudoir portraits. The simplicity helps photographers concentrate on client direction, posing and expression rather than managing several lights.
Use a sufficiently large softbox or octabox and place it about 45 degrees to the client, slightly above eye level and angled down. Bringing the modifier closer generally creates a softer apparent source, but keep it outside the composition and respect the client’s personal space.
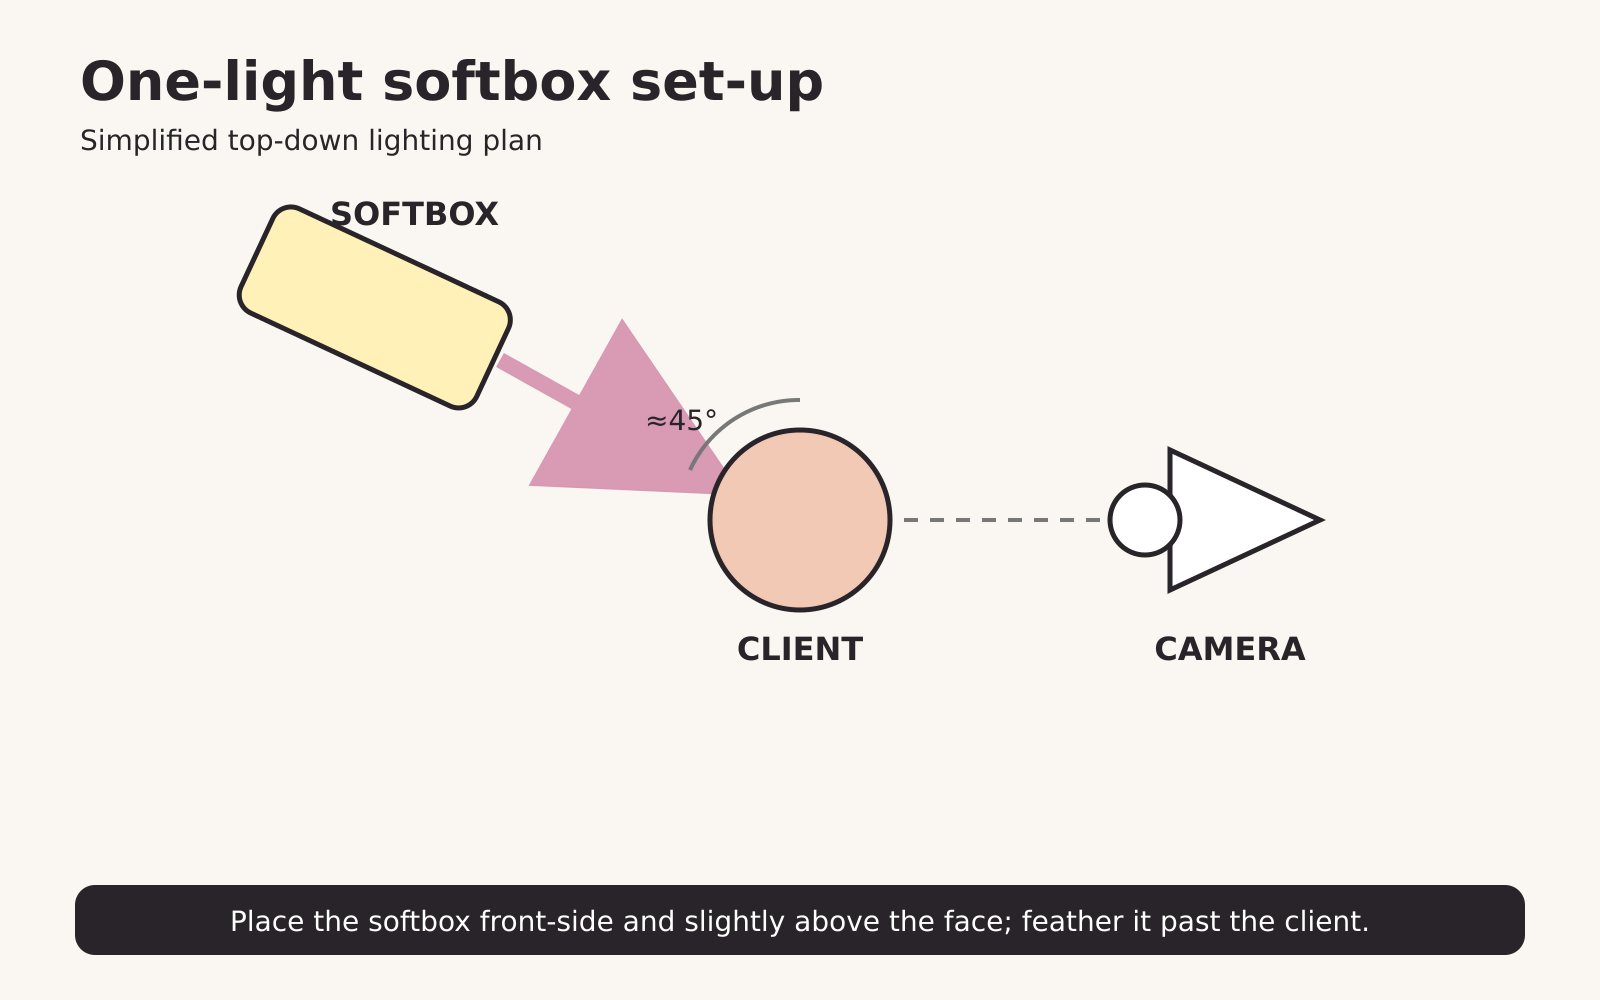
The exact height and angle should respond to the pose. A standing client, a seated client and someone lying on a bed cannot be lit identically without considering where the face and body have moved.
A reliable working sequence
- Set the ambient exposure low enough that uncontrolled room light does not dominate.
- Position the modifier to the side and slightly above the client.
- Set power for a secure exposure at your chosen aperture.
- Turn the client’s face towards and away from the light while observing the shadow pattern.
- Move the source before adding more equipment.
- Add a reflector only if the shadow side needs more detail.
For continuous LED lighting, judge the effect in real time but remain alert to shutter speed and colour accuracy. With flash, use a meter or test frames, then avoid interrupting the client after every photograph to inspect the screen.
Feathering the light
Pointing the centre of a softbox directly at the client can produce more illumination than you need and may increase spill onto the background. Instead, aim the modifier slightly past the client so they are lit by its softer edge. This is known as feathering and can create smoother skin transitions and greater control over the background.
When one light is the better choice
- the weather is inconsistent;
- the studio has limited or unattractive window light;
- you need a consistent series across several sets;
- the session takes place after dark;
- you want precise control over highlights, shadow and background brightness;
- you are matching a pre-planned visual style.
Backlighting for luminous boudoir portraits
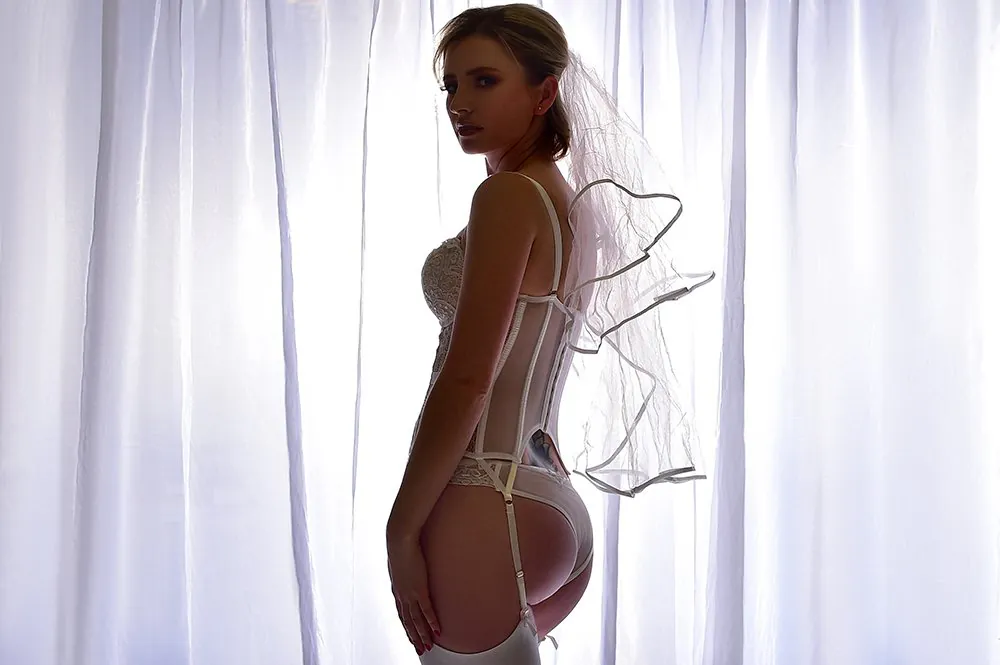
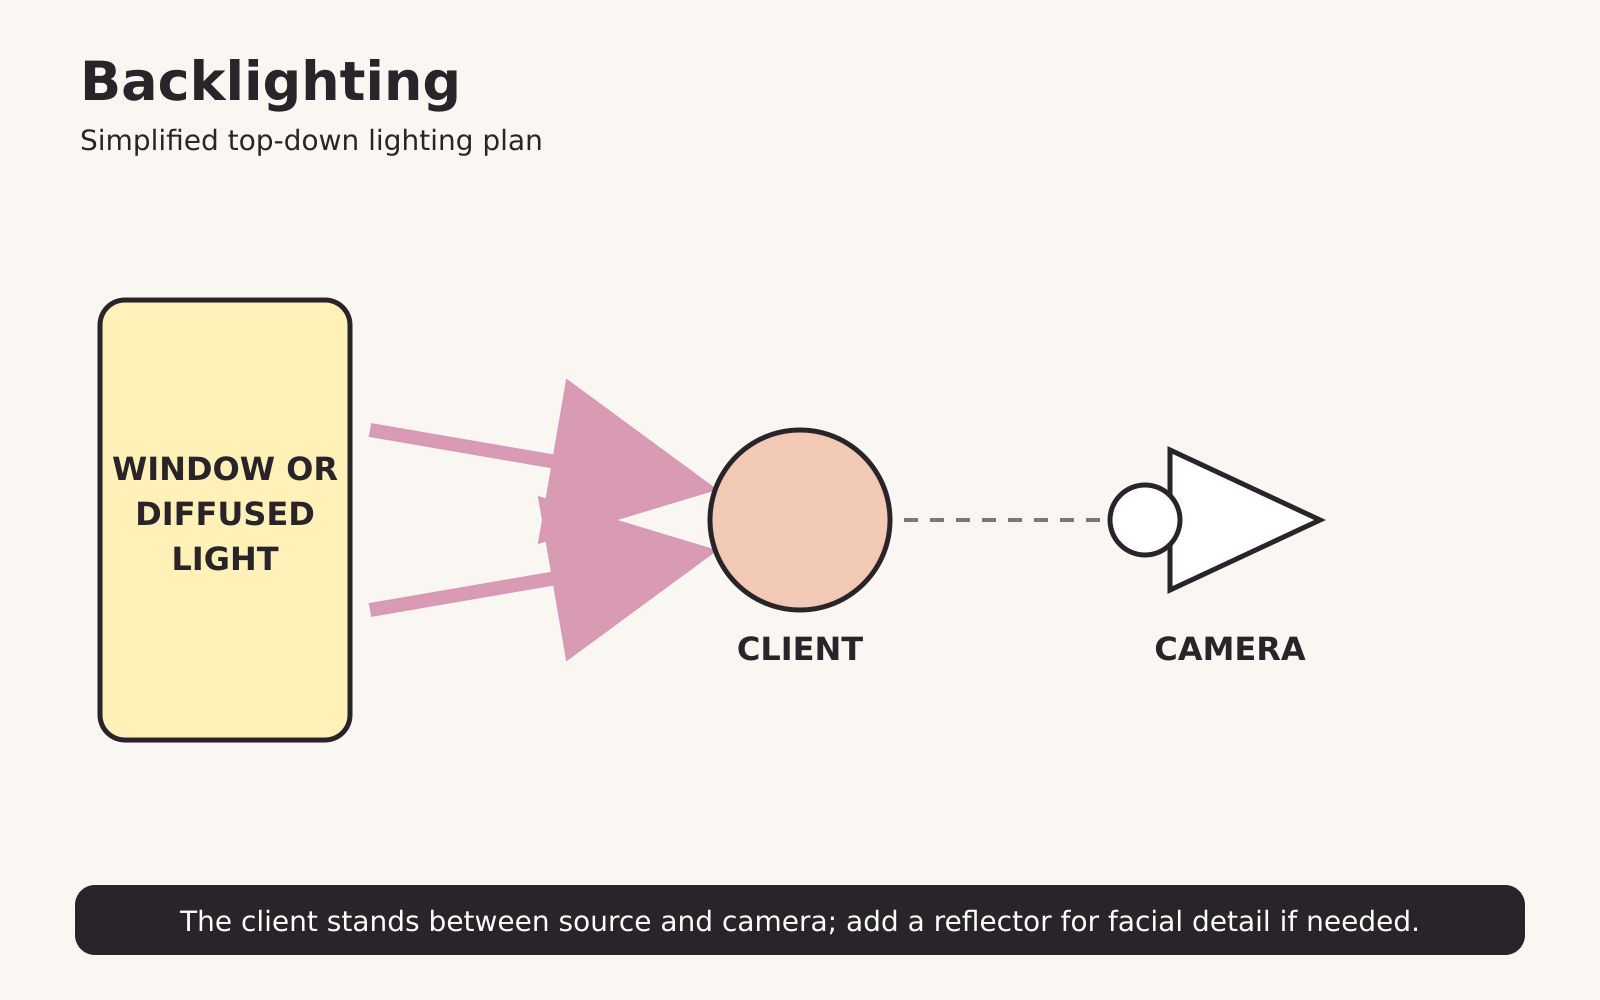
Backlighting places the primary source behind the client and towards the camera. It can separate hair from the background, illuminate sheer fabric and create a bright, romantic atmosphere.
The source may be a window, a diffused studio light or a light aimed through voile curtains. Place the client between the camera and the source, then decide whether you want detail in the face or a near-silhouette.
If you expose for the face, the background may become very bright. If you expose for the highlights behind the client, the body becomes darker and more graphic. Neither is automatically correct; the exposure should support the intended image.
How to control backlight
- Use curtains or diffusion to reduce a harsh source.
- Shield the lens with a hood or flag if flare removes too much contrast.
- Reposition slightly so the client blocks the brightest part of the source.
- Add a white reflector near the camera for gentle facial detail.
- Keep the reflector farther away if you want deeper shadows.
- Check the outline around hair, shoulders and garment edges.
Backlight is particularly effective with a translucent shirt, veil, lace, robe or sheet, but always confirm the client’s preferred coverage before lighting a fabric in a way that makes it more transparent.
Creating boudoir silhouettes
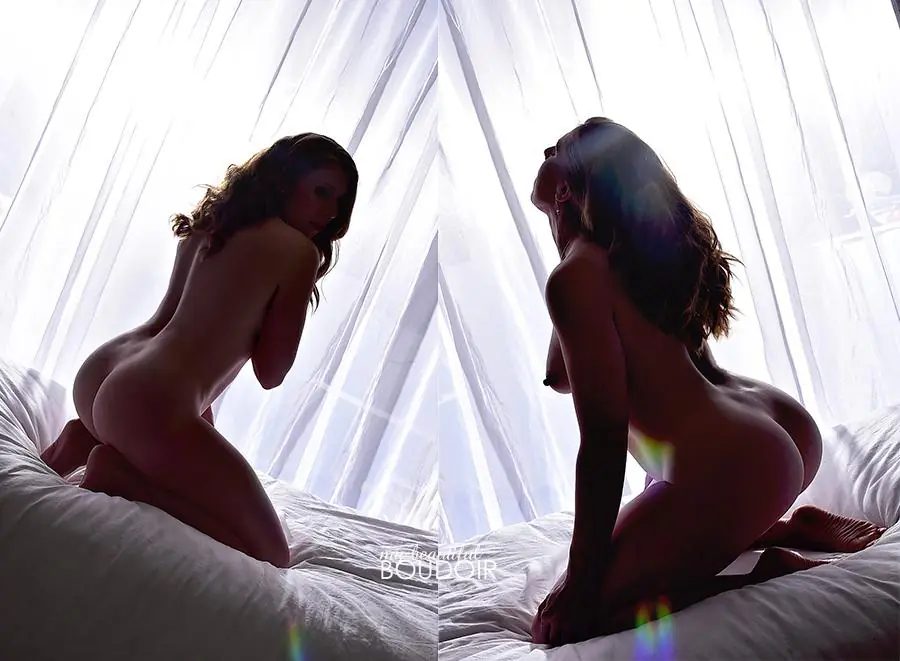
A silhouette is a deliberate reduction of detail that emphasises outline, posture and negative space. It works best when the client’s profile is visually clear and the background is significantly brighter than the body.
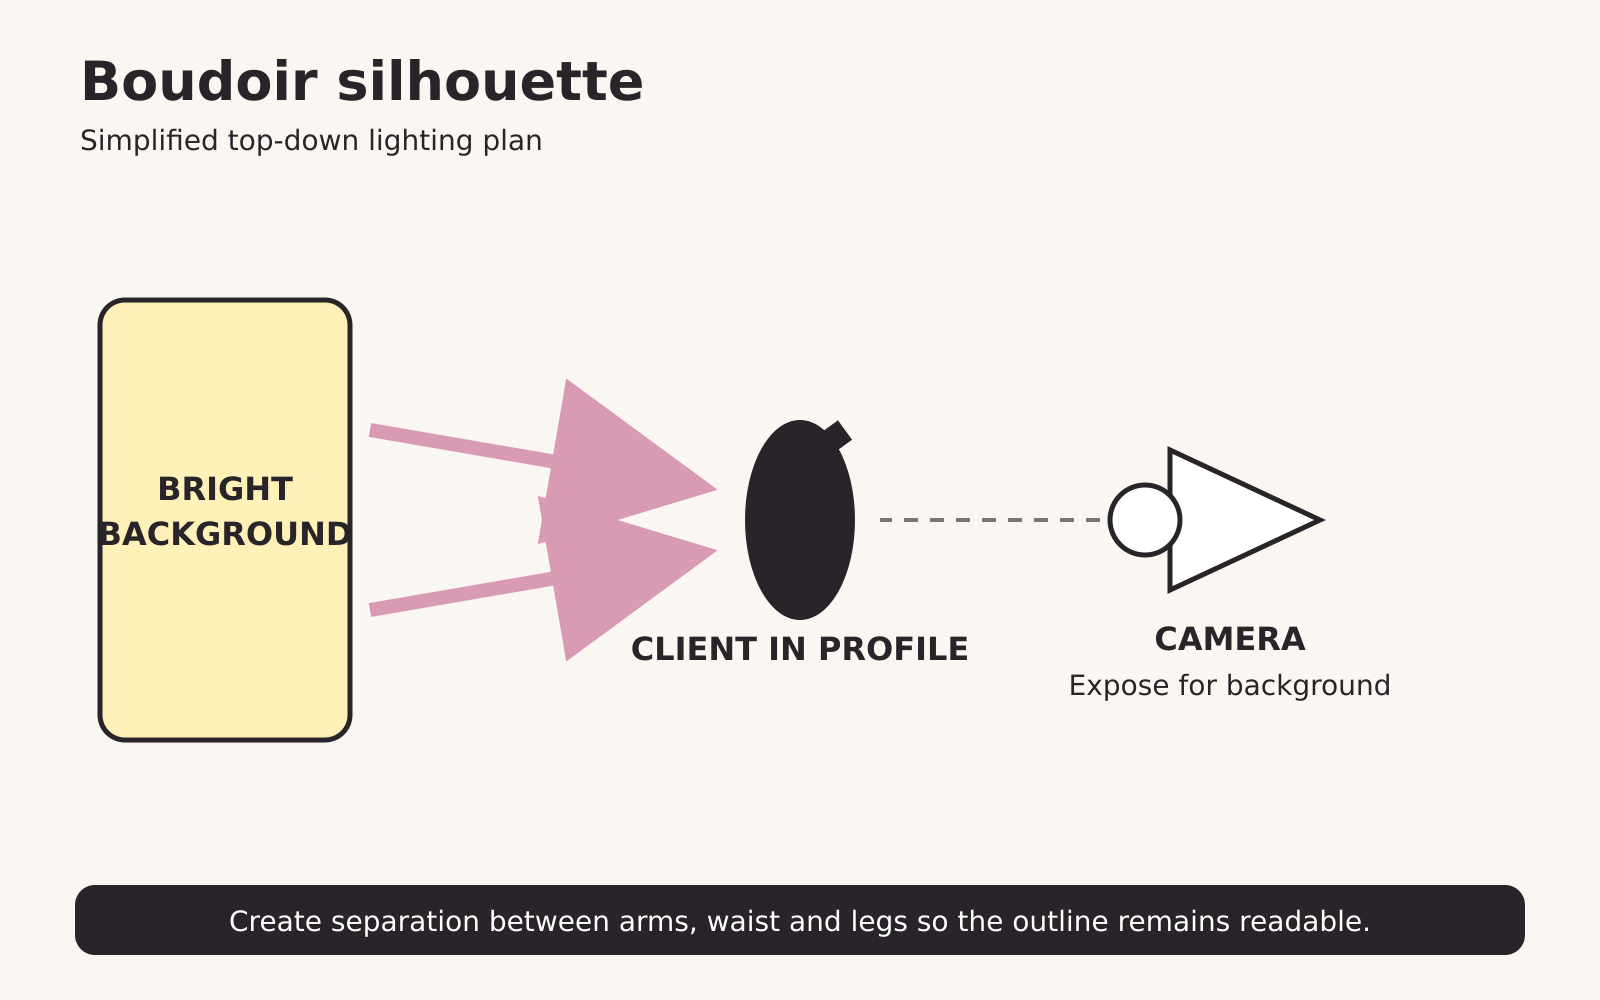
Position the client in front of a bright window or a separately illuminated backdrop. Expose for the brightest important area rather than the skin. Keep arms slightly separated from the torso and legs separated enough to avoid merging into one shape.
Direction prompt: “Turn into profile, create a small space between your arm and waist, then lift through your posture and hold the outline.”
The strongest silhouettes often use simple poses. Pay attention to the position of hands, chin, hair and garment edges because the viewer reads shape rather than facial detail.
Silhouette variations
- complete black silhouette against a bright window;
- partial silhouette retaining a small amount of facial or garment detail;
- rim-lit outline created with a studio light behind the client;
- silhouette through voile, frosted glass or a shower screen;
- close body-detail silhouette that removes identifying facial features.
A silhouette can support privacy, but it should not be presented as guaranteed anonymity without checking tattoos, body shape, surroundings and other identifying details.
 Dark-and-moody boudoir lighting
 Dark-and-moody boudoir lighting
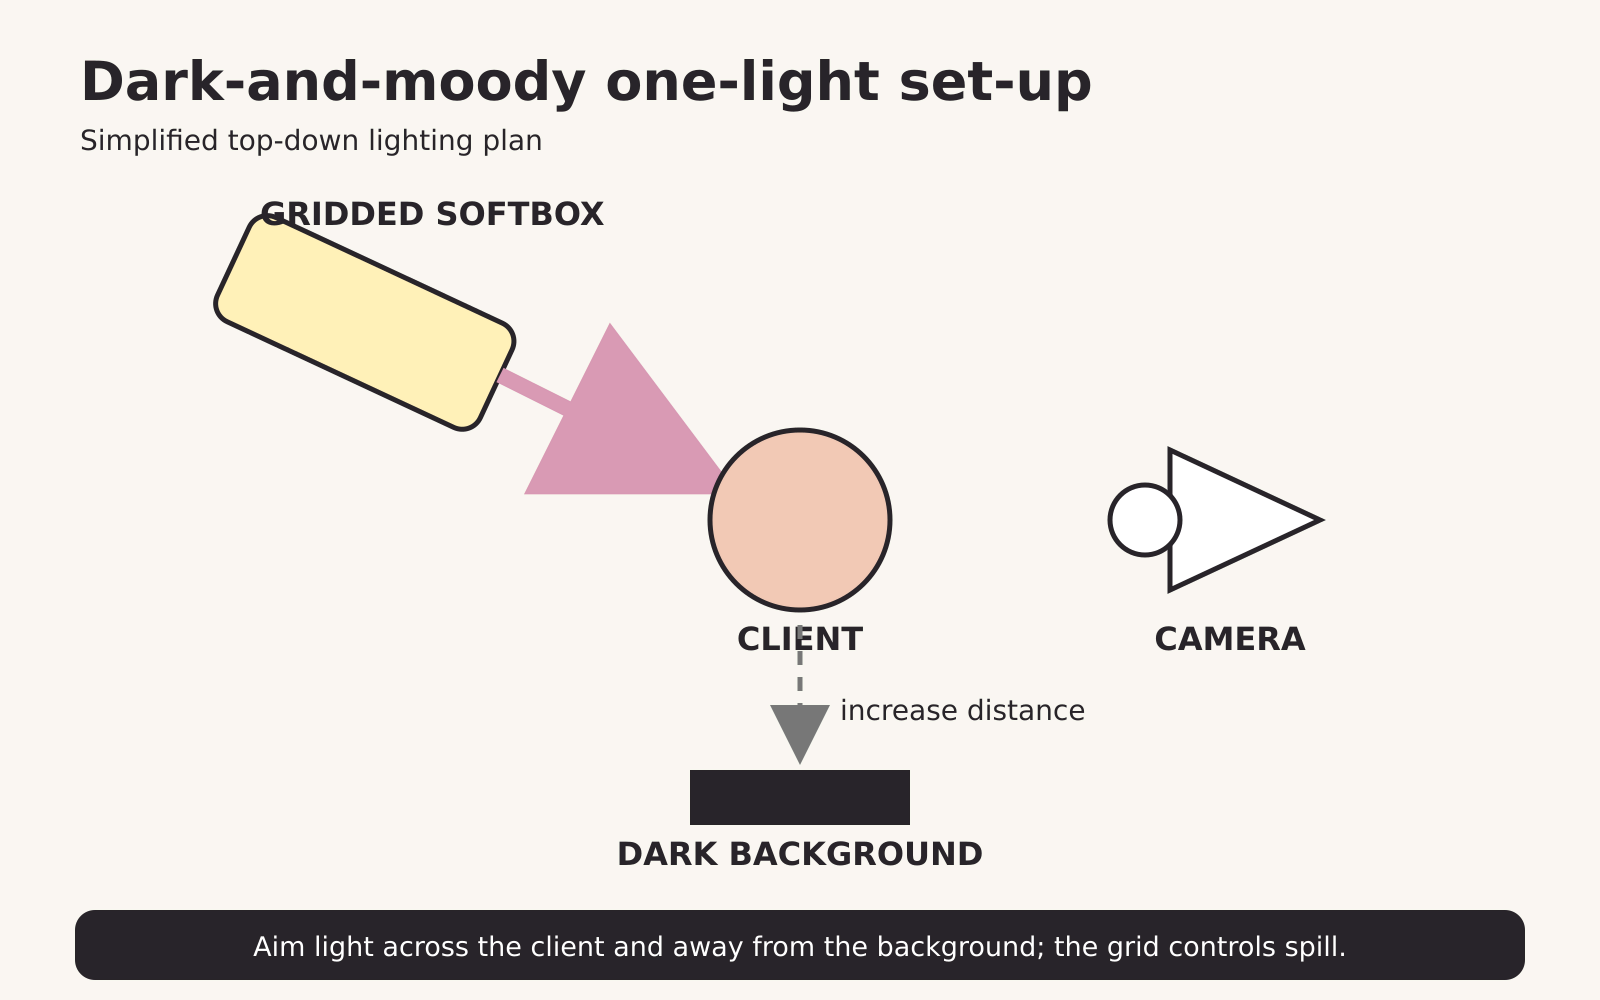
Dark-and-moody lighting is created through selective illumination, not simply by underexposing the entire photograph. Preserve purposeful highlights on the face or body while allowing other areas to fall gradually into shadow.
A large softbox placed to the side and slightly behind the client is a flexible starting point. Use a grid if necessary to limit spill, move the client away from the background and switch off unwanted ambient lights.
Step-by-step low-key set-up
- Choose a dark or unlit part of the set.
- Increase the distance between client and background when space permits.
- Place one controlled source to the side, slightly behind or across the client.
- Turn the client until light traces the desired face and body lines.
- Flag or grid the source if illumination spills across the background.
- Protect important highlights rather than lifting the whole exposure.
- Check that essential shadow detail is recoverable if your final edit requires it.
For a softer mood, use a larger source closer to the client. For a more defined, graphic result, reduce the apparent source size or move it farther away. Make changes intentionally; do not assume that harder light is inherently more sensual or sophisticated.
Common dark-and-moody mistakes
- underexposing without a clear highlight pattern;
- losing both eyes when the portrait needs connection;
- allowing the background to receive unwanted spill;
- using heavy editing to manufacture light that was not shaped during capture;
- letting black lingerie merge completely into an unlit background;
- asking the client to hold a difficult pose while repeatedly adjusting equipment.
Can natural light also create dark-and-moody boudoir images?
Yes. A window does not always produce a bright, airy aesthetic. Close most of the curtains and leave a narrow opening, place the client just beyond the beam and expose for the lit side of the face or body. The room will fall darker without needing additional equipment.
This works best when you can control other ambient light. The difficulty is repeatability: the beam may move or disappear as weather and time change. Studio light recreates the same principle with greater consistency.
Natural light and studio light can be combined
Mixed lighting is useful when each source has a clear job. A window might provide the key light while a controlled studio source lifts hair or background detail. Alternatively, a studio light can act as the key while daylight remains as gentle environmental fill.
Before combining sources, check colour temperature and direction. If they compete, the result can look accidental. Ask:
- Which source is the key light?
- What is the second source adding?
- Does the colour difference support the image?
- Can the same result be created more simply with one source and a reflector?
Complexity is not quality. If one light already produces the shape and mood you need, a second light may only introduce more variables.
Choosing the right light for the client and set
Lighting decisions should support the client rather than force them into a predetermined formula. Consider their preferred mood, coverage and features, then select a set-up that makes those choices achievable.
Use natural light when you want a gentle, observational atmosphere and reliable daylight is available. Choose studio light when consistency, precise direction or a dramatic look is more important. Switch between them when the gallery benefits from genuine variety.
The room also matters. At our private Leicester studio, the bedroom suite, voile, panelled walls, bath and shower area create different reflective surfaces and working distances. A lighting position that suits a soft bed portrait may cause unwanted reflections near marble, glass or mirrors. Walk through the set before the client arrives, check safe stand positions and test how light travels across each surface.
A practical boudoir lighting workflow
Use this sequence before every set:
- Decide the intended mood and the feature you want to emphasise.
- Identify the existing light and switch off sources you do not need.
- Choose one key source: window or studio light.
- Place the client and turn their face and body in relation to that source.
- Refine the source’s height, angle, distance and diffusion.
- Check highlights, shadows, colour and background spill.
- Photograph several pose and crop variations before rebuilding the light.
- Review for technical problems, then return your attention to the client.
This keeps lighting purposeful while preserving the connection and direction that make a boudoir session feel professional.
Learn boudoir lighting in a working studio
Lighting diagrams are helpful, but the most useful learning happens when you can move a source, observe the effect and make a correction in real time. Our hands-on boudoir photography workshop in Leicester helps photographers develop practical lighting, posing and client-direction skills inside a purpose-built boudoir studio.
You can learn how light behaves across different sets, practise simple lighting patterns and understand how small changes in angle, distance and client position alter the final portrait.
Continue learning with our boudoir photography posing and client-direction guide, featuring ten practical foundation poses.
FREQUENTLY ASKED QUESTIONS
Can you photograph boudoir with only one studio light?
Yes. One light with a suitable modifier can create soft portraits, side-lit images, backlighting, silhouettes and dark-and-moody work. Moving and shaping one source is often more valuable than adding several lights too quickly.
Where should a softbox be placed for boudoir photography?
A useful starting point is approximately 45 degrees to the client and slightly above eye level, angled down. Adapt its height and direction to the pose, then refine the position by observing highlights and shadows.
How do you create soft window light for boudoir portraits?
Use a large window, diffuse direct sun with sheer curtains and position the client around 45 degrees to the source. Move the client rather than relying only on camera settings to change the quality of light.
How do you create a boudoir silhouette?
Place the client between the camera and a much brighter window or background, then expose for the bright area. Direct a clear profile with separation between the arms, torso and legs so the outline remains readable.
How do you make boudoir lighting look dark and moody?
Use selective, directional light and control spill onto the background. Place one source to the side, turn the client until it traces the desired features and retain intentional highlights instead of simply underexposing the frame.
Should beginners use continuous light or flash for boudoir photography?
Continuous light makes the pattern visible while you work and can simplify early learning. Flash normally provides more power and greater control over ambient light. The best choice depends on the room, the desired aperture and whether you can maintain a safe shutter speed.